Store Management
Onwheel provides customers with the feature to manage various establishments such as stores, branches, supermarkets, warehouses, etc., enabling the division and tracking of orders for each specific location.
Store Management
Creating a New Store
Customers navigate to the Location Setup tab and select the Store section to perform the following steps:
- Step 1: Choose the Create a New Store option.
- Step 2: Enter the following information:
- Store name
- Store phone number (if applicable)
- Store address
- Step 3: Click Save to save the store information.
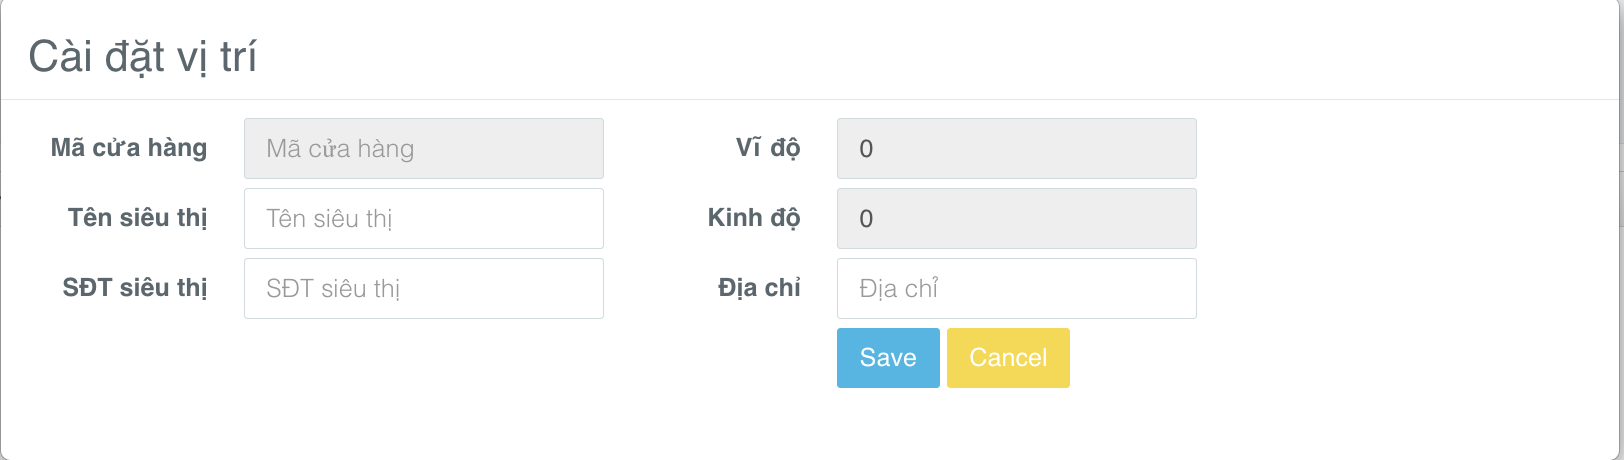
Each store created will be identified by a Store ID with a default structure of partner name_store creation order number (e.g., onwheel_1, onwheel_2, ...).
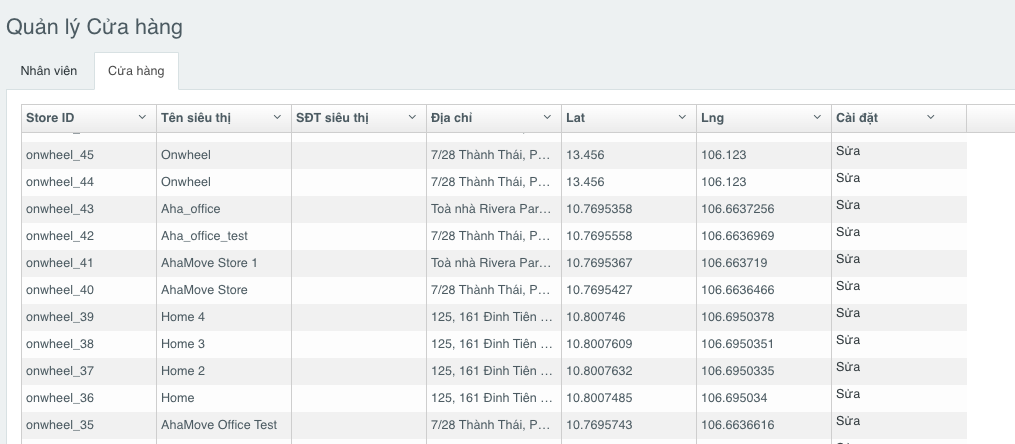
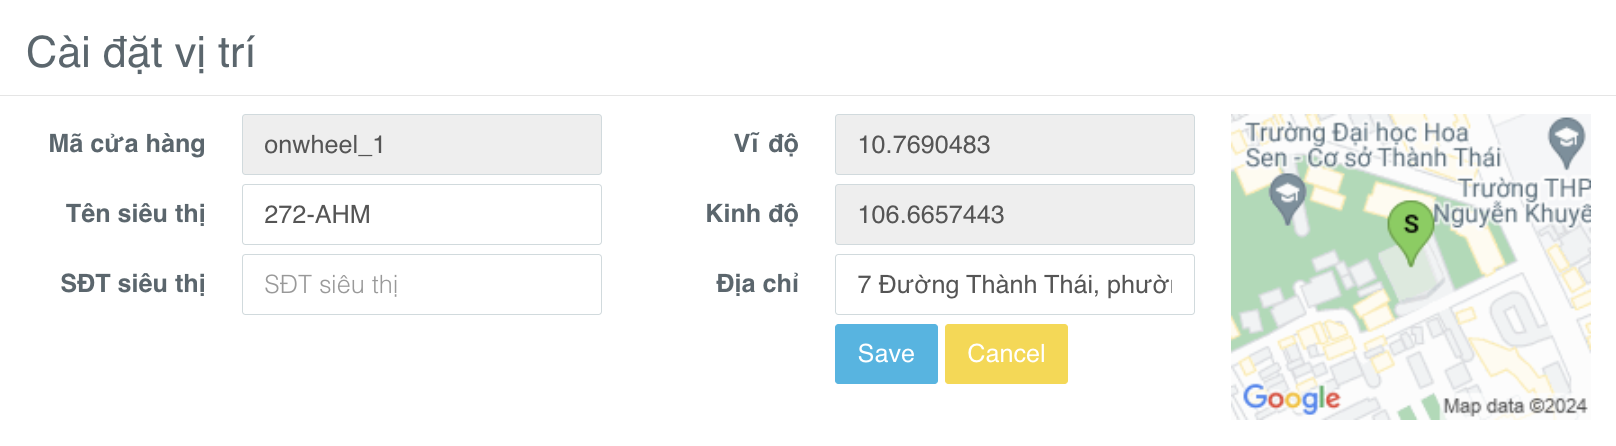
Updating Store Information
Customers can update store information under the Edit section.
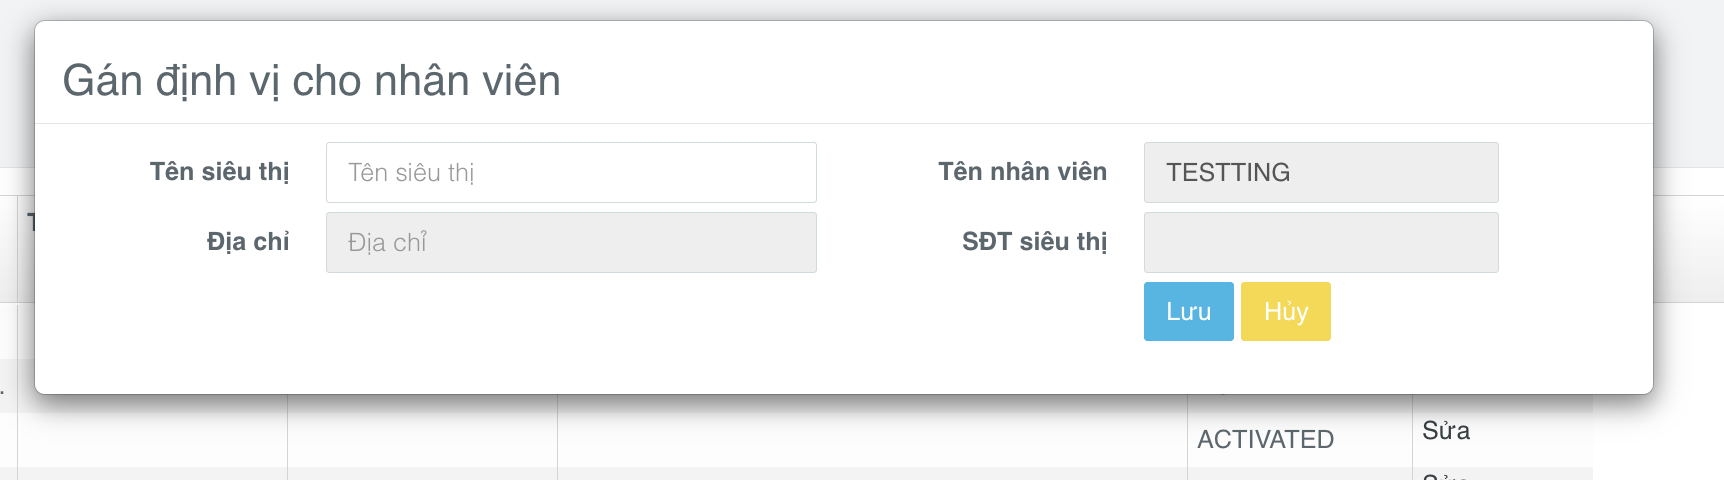
Assigning Stores to Employees
Customers select the Employees section to perform the following steps:
-
Step 1: Choose the employee to assign a store to and select Edit.
-
Step 2: Enter the store name. A list of suggested stores will be displayed as shown below.
-
Step 3: Click Save to save the information.
For Admin accounts used to manage all stores and employee accounts, there is support for the additional feature of Removing Identification. Customers provide the phone number to the Onwheel team to configure Admin accounts on the whitelist.
Zone Filtering
Zone filtering is an advanced feature within the Store Management function that helps customers manage and divide stores and employees into specific regions.
If customers wish to use this advanced feature, please contact the Onwheel team for consultation.
Creating a New Store
Customers select the Store Categories section to perform the following steps:
-
Step 1: Choose the Create a New Store option.
-
Step 2: Enter the following information:
Information Required Description Delivery Point Name Yes Store name Delivery Point Code Yes Store code Address Yes Store address Store Phone Number No Store phone number Region No Divide stores by region Price Per Delivery No Configured price per delivery (if applicable) Exceeding Km Fee No Choose exceeding km fee (if applicable) Priority Orders (minutes) No Priority orders displayed within a specified time range (if applicable) Display Priority Service No Display Ahamove service when creating an order for each store -
Step 3: Click Save to save the information.
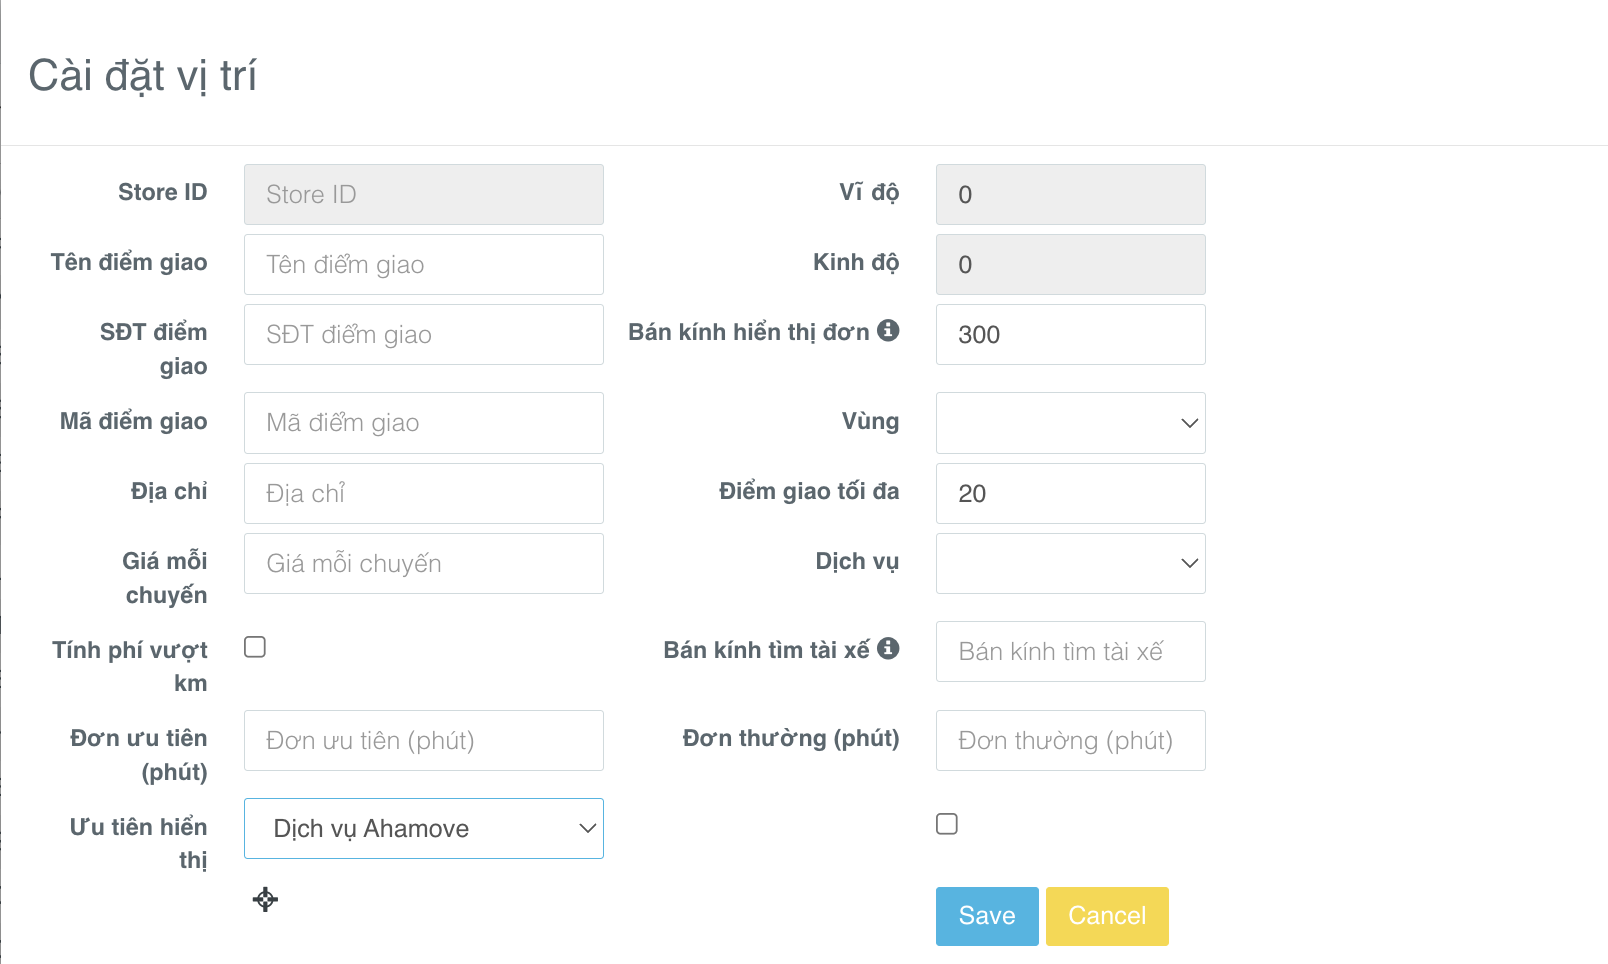
Each store created will be identified by a Store ID with a default structure of partner name_store creation order number (e.g., onwheel_1, onwheel_2, ...).
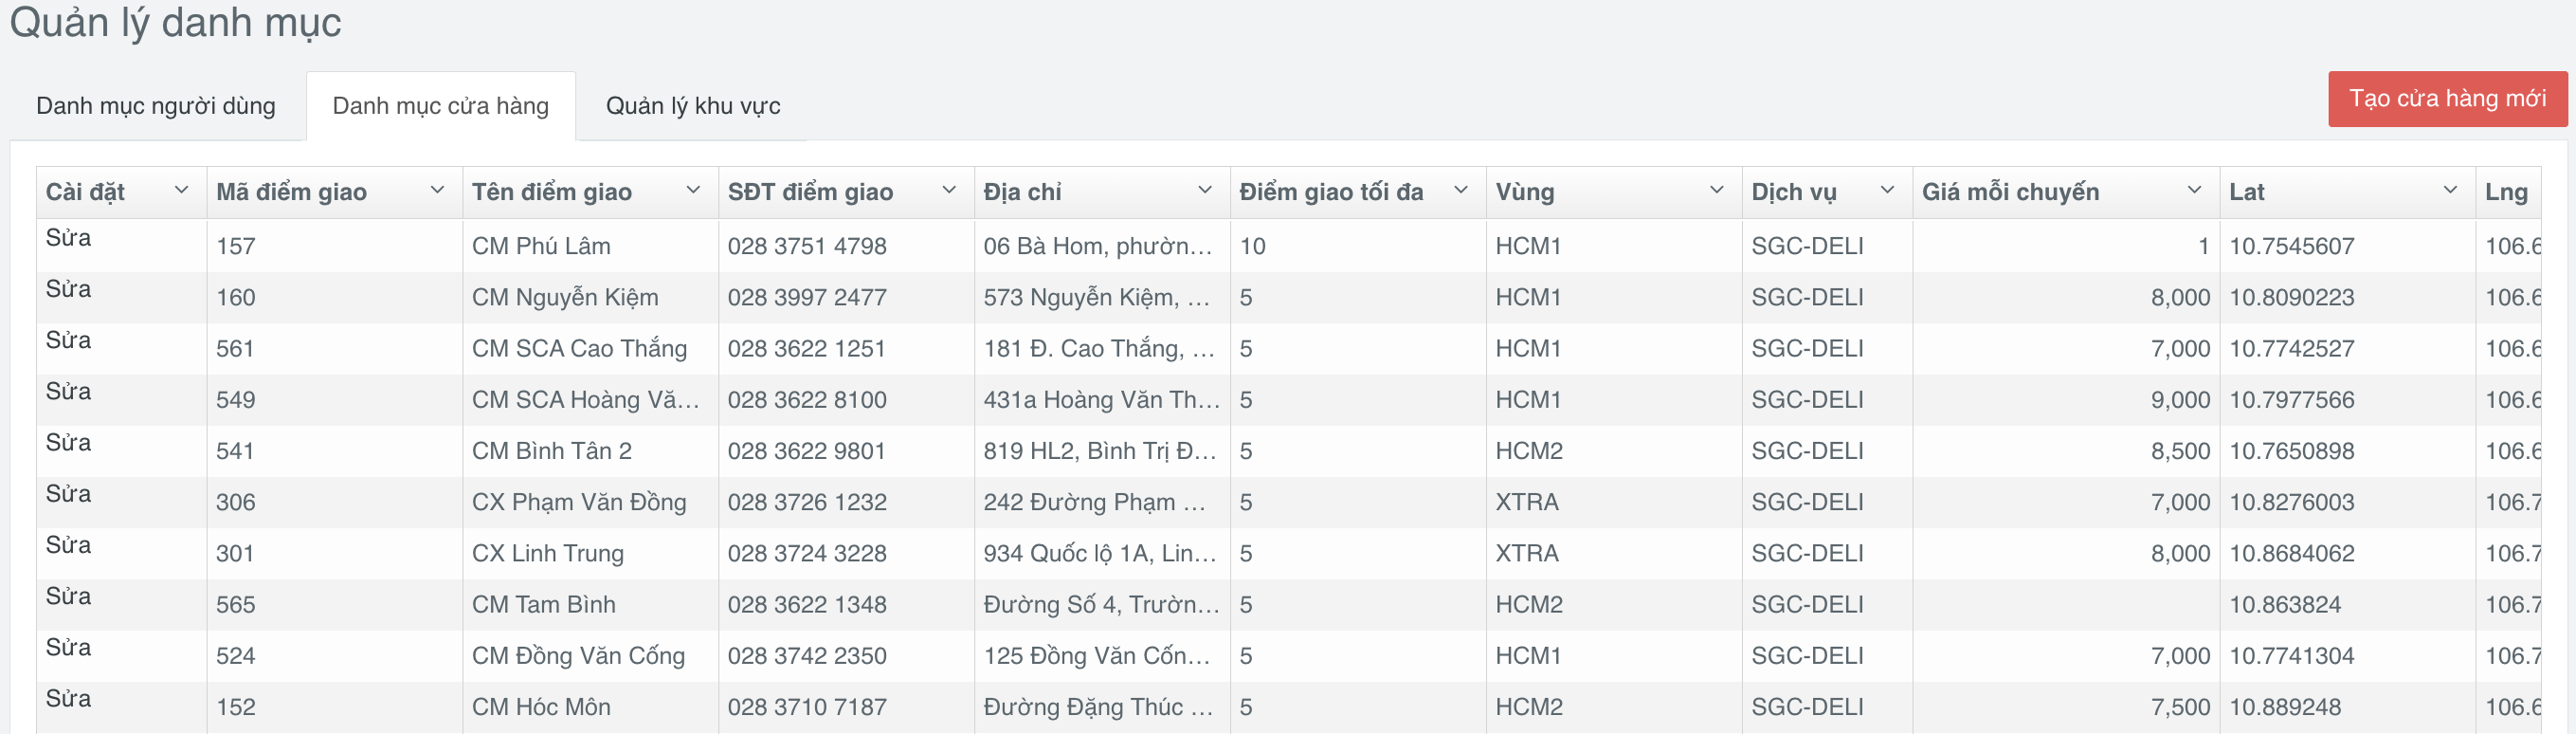
Creating a New Zone
The main function of managing zones is to serve the tracking of reports configured for each store.
Customers navigate to the Location Setup tab and select the Manage Zones section to perform the following steps:
-
Step 1: Choose the Create New Zone option.
-
Step 2: Enter and select the following information:
- Zone Name
- Reports that can be viewed in each zone
- Stores within the zone
- Description of the zone (if applicable)
-
Step 3: Click Save to save the information.

Customers can update zone information under the Edit section and can quickly search by zone name.
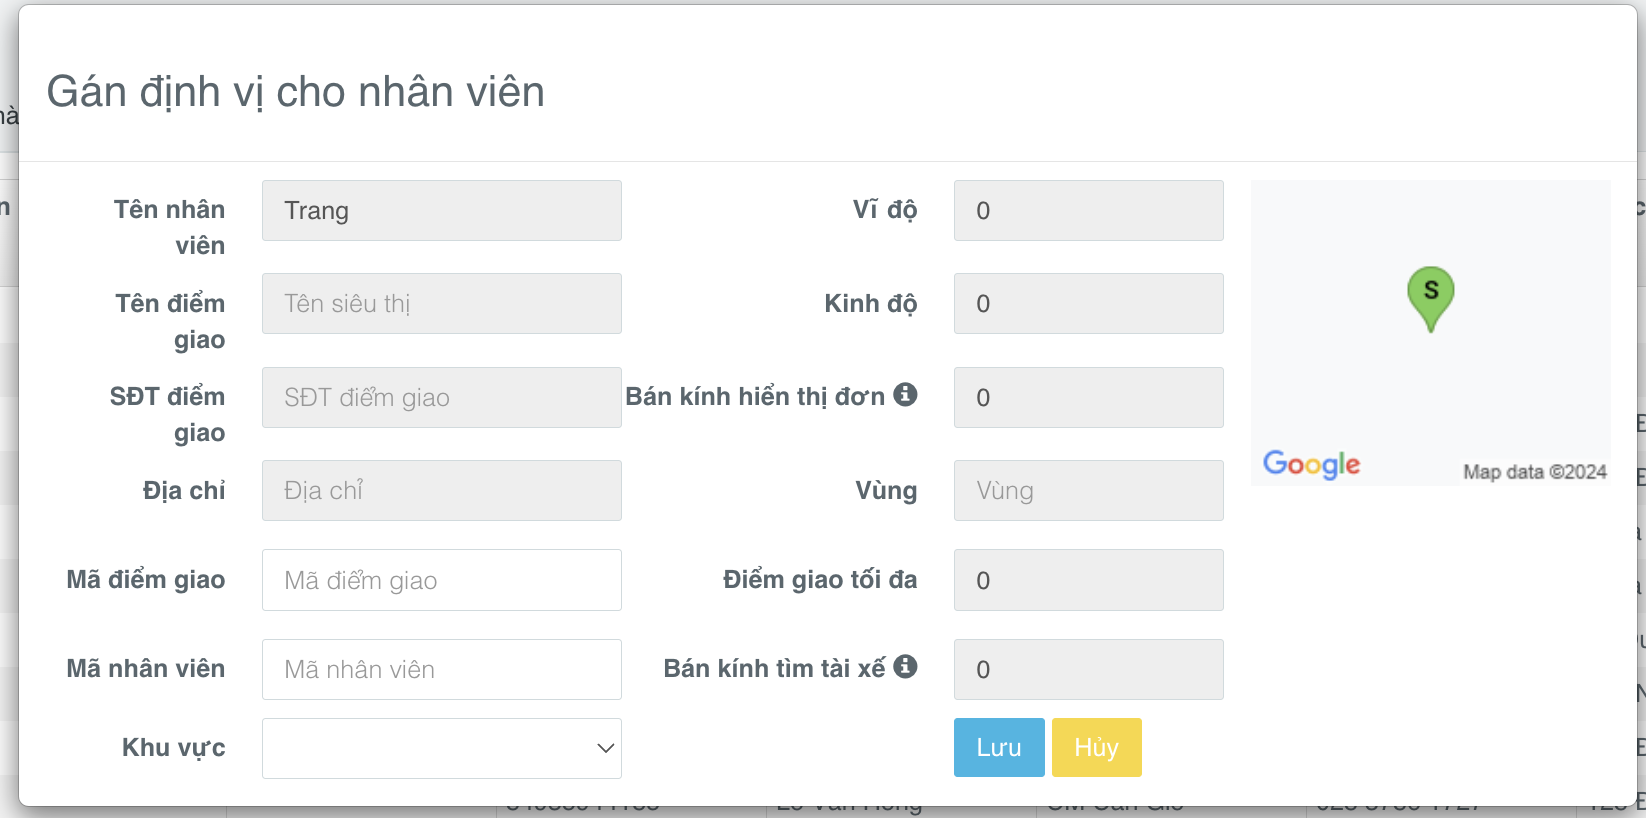
Assigning Stores/Zones to Employees
Customers select the User Directory section to perform the following steps:
-
Step 1: Search for an employee by ID (Phone Number) or Employee Name or Employee Code.
-
Step 2: Confirm the correct employee information to be assigned and select Edit.
-
Step 3: Enter the following information to assign a store or zone to the employee:
- Store ID
- Employee ID (if applicable)
- Zone
-
Step 4: Verify the information and click Save.
For Admin accounts used to manage all zones, stores, and employee accounts, there is support for the additional feature of Removing Identification. Customers provide the phone number to the Onwheel team to configure Admin accounts on the whitelist.